DIY WiFi Clock Upgrade for Accuracy and Features


Old-fashioned quartz clocks make a rubbing sound and have limited functions. LED clocks require frequent adjustments to their capacitors to minimize errors, and the R8025T model is prone to inaccurate timekeeping after power outages. Even modified radio-controlled clocks can suffer from poor signal quality.
So how can you choose or modify a clock to make it perfect?
The purchasing process:
First, there are four types of automatic time-setting clocks online: radio-controlled, base station, satellite, and WiFi time-setting. Radio signals can be weak, satellite time-setting may require an external antenna, and base station clocks tend to be more expensive. Therefore, WiFi time-setting is a good option, offering split-second accuracy and real-time and future weather forecast functions. While digital clocks are not cheap and have limited functions, a WiFi matrix screen clock would be better. However, the price for such a clock varies by a hundred or so yuan, depending on the screen and functions. You can start by purchasing a clock with two P3 screens spliced together to form a 128x64 matrix display. This clock supports functions such as the Gregorian and lunar calendars, and weather forecasts, and automatically sets the time accurately to the second. If you have other clocks at home, you can buy three more modules for modification.
The modification process: Choose a P2.5 full-color matrix screen because most P3 screens are 64x64 matrices and require two to splice together. This module not only supports P3 screens, but also low-refresh screens, P2.5 screens, and other 128x64 resolutions, as long as the interface matches. The following is a list of purchased modules: The upper left row of this module is connected to the WiFi time-setting module, with a light-sensitive resistor beside it, and the black line on the lower left is an NTC thermistor.
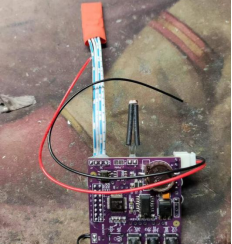
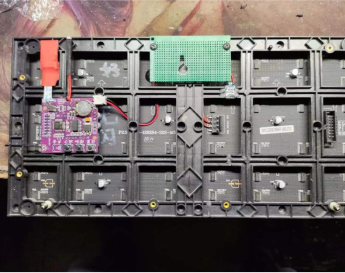
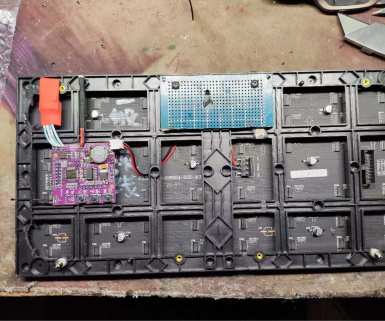
First, make a minor modification to the module by replacing the tall micro switch with a short one to lower the module height, moving the power connector to the front, trimming the WiFi module cable, lengthening the light-sensitive resistor pins, and trimming the NTC resistor pins. Then insert the module into the PM2.5 screen and solder the power cable to the screen's unused capacitor pin since both the screen and the module are powered by 5V. Add a type-C interface. Mount the module onto a perforated board, find the center of gravity, open a screw hole, and assemble the clock.
The screen brightness varies from 1-8 watts, with a default brightness of up to 350. Indoors, a brightness of 5-50 is sufficient, with a power consumption of less than 2 watts. Use 0.21 enameled wire to run two wires along the wall, and tape them up with base tape so they are not visible.
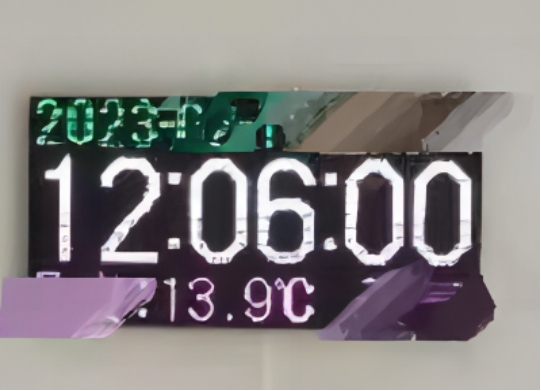
The actual effect is much better than the picture. The clock supports multiple display modes and can show the Gregorian and lunar calendars, real-time weather conditions, weather forecasts, temperature, humidity, and more. You can customize the time server, calibrate the temperature, fine-tune the time and time server deviation in milliseconds, font color, scrolling text, and more.
Give it a try and operate it yourself.


