Build Your Own Aluminum Keyboard on a Budget


If you're a fan of metal accessories and have been itching to get your hands on an aluminum keyboard but don't want to break the bank, you're in luck! In this article, we'll guide you through the process of building your own customized aluminum keyboard without spending a fortune. Whether you're a tech enthusiast or simply looking for a fun DIY project, follow along as we explore the steps and considerations involved in creating your dream keyboard.
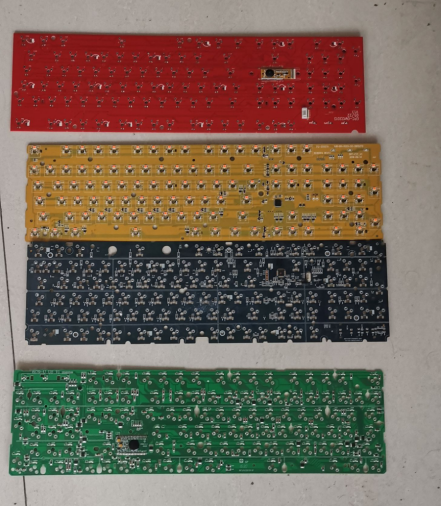
Choose a dismantled keyboard PCB that is usable. In the picture below, there are four keyboard PCBs: the yellow one is a double-layered PCB with optical switches, so we'll pass on that; the blue one has an incompatible controller, so that's also a pass; remember that the red one is an ES version with malfunctioning functions, so it's another pass. The green one is the board from the Thunderobot K71B, and the controller can be transplanted, so it's an option.
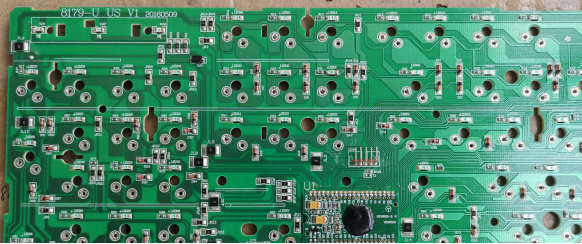
Take a photo or use another method to record the original wiring.
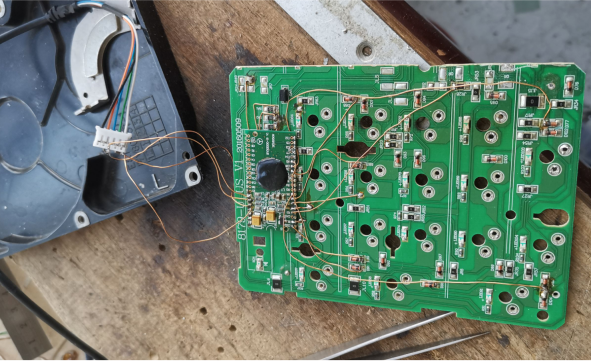
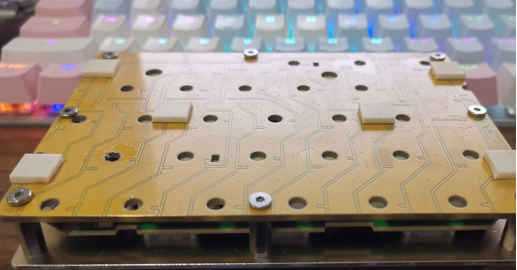
The final result after transplantation should be as follows (excluding the plate cutting and controller transplantation).
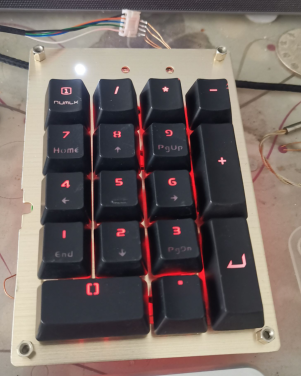
Cut out the small keyboard area from a scrapped keyboard's positioning plate, attach some salvaged switches and worn-out keycaps, and test the effect. It should light up in one go, making things easier.
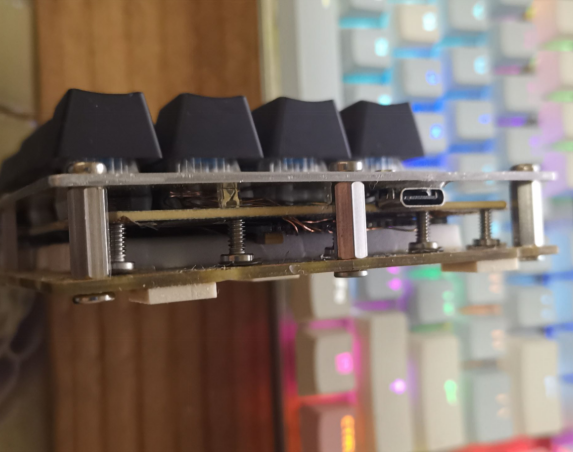
If you find the appearance too ugly and think it's messy with wires that look terrible, you can use some hard drive screws, cut a piece of the base plate, and make a complete set. Note that hard drive screws have coarse threads, while hexagonal pillars have fine threads. You can use 16 stainless steel screws with fine threads, M3*4 in size. If there is no base plate, you can cut the optical switch plate instead, as fiberglass plates usually have better quality.
Find a Type-C socket, drill a hole in the positioning plate, screw it in for positioning and reinforcement, then reinforce it with epoxy resin, solder the wires, and assemble it. Both keyboards have separate key and wire connections. The grounding wire on the original PCB will slightly elevate the board, so use five screws to hold it in place for now.
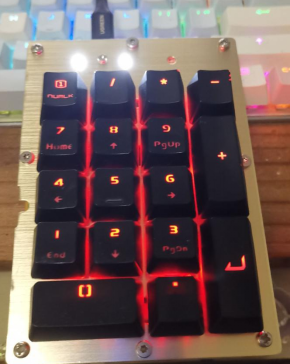
Once finished, perform a power test. If the print screen light doesn't turn on, it's because the switch on the keyboard is not functioning properly. However, solving this issue is relatively simple, and you can make your own improvements as needed.
In conclusion, constructing your own aluminum keyboard doesn't have to be expensive or complicated. By repurposing dismantled keyboard components and utilizing basic tools, you can create a unique and functional keyboard that suits your preferences and budget. From salvaging switches and keycaps to reinforcing the design with epoxy resin, this DIY project offers endless possibilities for customization. So, go ahead and embark on your keyboard-building adventure, and enjoy the satisfaction of typing away on a keyboard that you've personally crafted.


