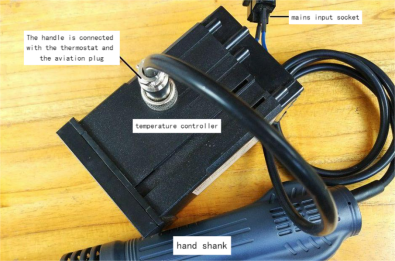
Compact Hot Air Gun: Quick-Connect Handle & PID Controller


There are expensive and cheap finished hot air guns available. However, the finished products are too large and inconvenient to store. So, a compact hot air gun can be created by using the handle of the Quick-Connect 2008 hot air gun along with a finished PID temperature controller. It is convenient for storage and portability.
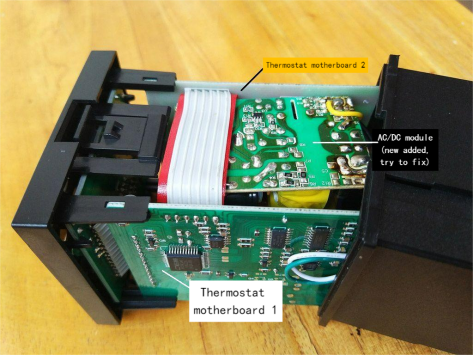
The circuit structure is not particularly innovative, as shown in the diagram below. The PID temperature controller is an industrial universal device available in various specifications and sizes. Here, you have to choose a specification with dimensions of 7272111mm, which provides a solid-state control signal output. It can accommodate the AC/DC module and the thyristor control circuit, effectively reducing the overall size of the device.
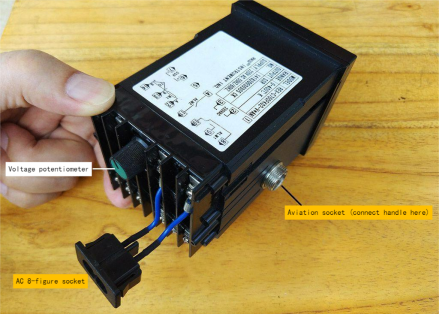
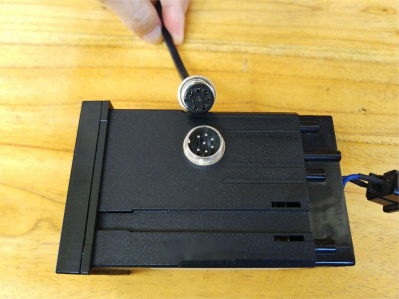
Note: The connection between the Quick-Connect handle and the temperature controller is made using an aviation plug, which is not shown in the diagram. In the actual production, the reed switch inside the handle was replaced with a mercury switch to control automatic heating when the nozzle is facing downward and to stop heating when it is facing upward. For simplicity in the diagram, this modification has been omitted.
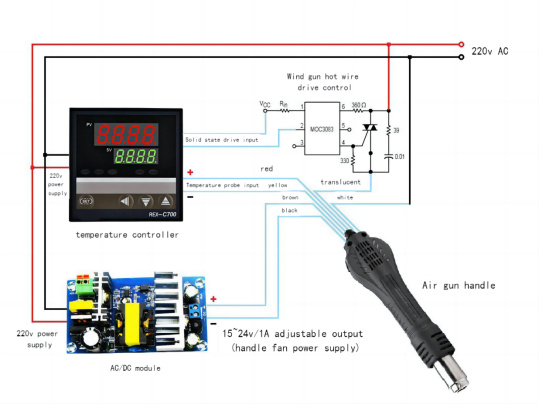
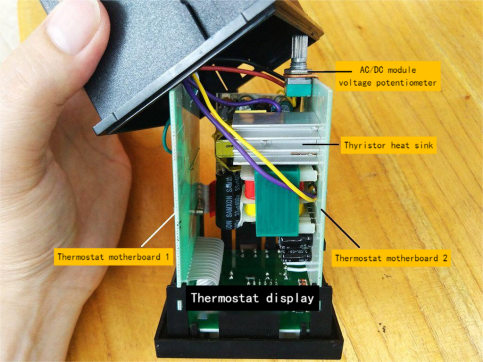
The AC/DC module selected is a small-volume 24V1A module, and it has been modified to be adjustable in voltage (refer to relevant articles for modifying TL431 to be adjustable), allowing control over the hot air gun's airspeed. The voltage-adjusting potentiometer is fixed on a large copper pin, which is then secured to the temperature controller PCB. For the bidirectional thyristor, a BT138 was chosen and it requires a heat sink. The heat sink is fixed to the temperature controller PCB. The completed diagram is shown below.

The specific debugging method should be referenced from the temperature controller's instruction manual. It mainly involves setting the thermocouple type to K-type, setting the working cycle to 1 second (the shortest), and then adjusting the temperature to the desired value. After that, manual PID settings or autotuning can be performed.
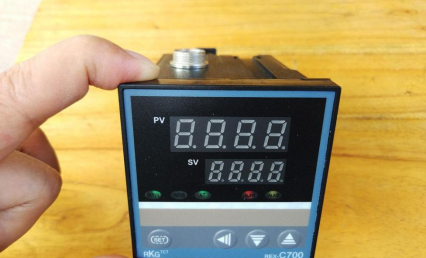
Usage: This temperature controller's screen can simultaneously display the set temperature and the measured temperature. Generally, after powering on, the temperature quickly rises to the set value, but then slight oscillations occur. Sometimes the oscillation amplitude is larger (reaching positive and negative tens of degrees), while other times it is smaller (without changing the settings). Although autotuning has been performed multiple times, it is still usable for practical purposes.
The cable colors indicated in the circuit diagram are for the Quick-Connect 2008 handle. If using a different handle, please verify the connections accordingly.


