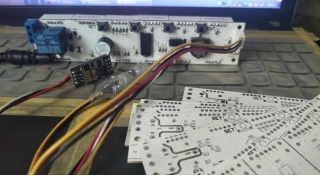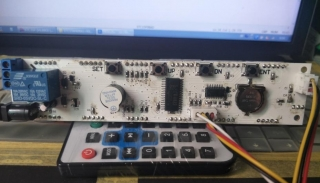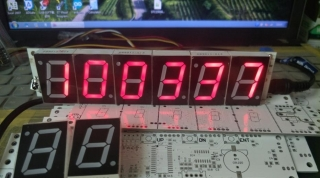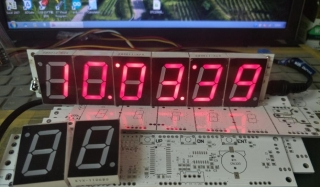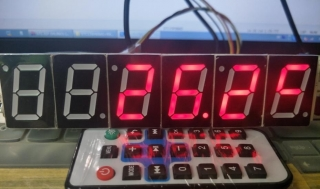
Discover how to construct a sophisticated 4-key 6-digit 1-inch digital clock using cutting-edge components like RX8025AC and STC15W408AS. This device boasts a range of functionalities, making it an ideal choice for a variety of applications.
Overview of Functions:
1. Temperature detection function: Automatically detects the presence of DS18B20 temperature chip and displays the temperature value when the seconds digit is 3/4.
2. Infrared remote control function: Can learn NEC-type remote control codes.
3. GPS time synchronization function: Optional purchase of our WiFi to GPS module for NTP time synchronization (performed once on power-up and every hour at 30 minutes past the hour).
4. Remote control forced time synchronization switch.
5. One-channel high-power timing switch control: Can control the power on/off of electrical devices below 10A (on/off time can be set by the user at any time within 24 hours).
6. One-channel default one-minute alarm that the user can turn off in advance (alarm time can be set by the user at any time within 24 hours).
7. Hourly beep timekeeping (beeps corresponding to the hour).
Operating Instructions:
In normal timekeeping mode:
· Pressing the SET key for the first time makes all 6 digits and 4 second points blink together. Press the ENT key to enter the setting of normal timing values.
· Pressing ENT for the first time makes the first 2 digits blink, indicating the setting is for the hour value. Use UP or DN keys to increase or decrease the hour value.
· Pressing ENT for the second time makes the middle 2 digits blink, indicating the setting is for the minute value. Use UP or DN keys to increase or decrease the minute value.
· Pressing ENT for the third time makes the last 2 digits blink, indicating the setting is for the second value. Use UP or DN keys to increase or decrease the second value.
· Press ENT again to exit the setting and save.
In normal timekeeping mode:
· Pressing SET for the second time displays "Auto." Pressing ENT enters the setting for automatic power on and off.
· Display shows "A oN" or "A oFF." Press UP or DN to cycle between "A on" and "AoFF" and save the setting.
Press ENT again to exit the setting and save.
In normal timekeeping mode:
· Pressing SET for the third time displays "oN**:**." Pressing ENT enters the setting for automatic power-on time.
· Press ENT for the first time makes the middle 2 digits blink, indicating the setting is for the hour value. Use UP or DN to increase or decrease the hour value.
· Press ENT for the second time makes the last 2 digits blink, indicating the setting is for the minute value. Use UP or DN to increase or decrease the minute value.
· Press ENT again to exit the setting.
In normal timekeeping mode:
· Pressing SET for the fourth time displays "oF**:**." Pressing ENT enters the setting for automatic power-off time.
· Press ENT for the first time makes the middle 2 digits blink, indicating the setting is for the hour value. Use UP or DN to increase or decrease the hour value.
· Press ENT for the second time makes the last 2 digits blink, indicating the setting is for the minute value. Use UP or DN to increase or decrease the minute value.
· Press ENT again to exit the setting.
In normal timekeeping mode:
· Pressing SET for the fifth time displays "ALAr." Pressing ENT enters the setting for the alarm enable and disable.
· Display shows "L oN" or "LoFF." Press UP or DN to cycle between "L on" and "LoFF" and save the setting.
· Press ENT again to exit the setting and save.
In normal timekeeping mode:
· Pressing SET for the sixth time displays "AL**:**." Pressing ENT enters the setting for the alarm time.
· Press ENT for the first time makes the middle 2 digits blink, indicating the setting is for the hour value. Use UP or DN to increase or decrease the hour value.
· Press ENT for the second time makes the last 2 digits blink, indicating the setting is for the minute value. Use UP or DN to increase or decrease the minute value.
· Press ENT again to exit the setting.
In normal timekeeping mode:
· Pressing ENT once toggles the output of the power control output terminal.
· Pressing and holding any of the 4 function keys for about 5 seconds enters the infrared code learning mode. Once learning is correct, it will be automatically saved.
· Pressing and holding SET displays "SET1," indicating the learning of the SET key infrared code.
· Pressing and holding UP displays "SET1," indicating the learning of the UP key infrared code.
· Pressing and holding DN displays "SET1," indicating the learning of the DN key infrared code.
· Pressing and holding ENT displays "SET1," indicating the learning of the ENT key infrared code.
