
DIY Spot Welding Handle for Easy Battery Welding


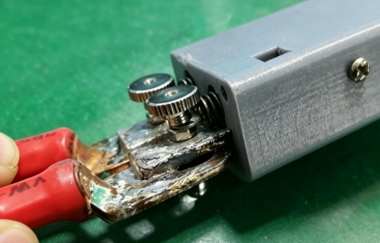
If you are interested in making a DIY spot welding handle, you may want to check out this article.
If you often find it inconvenient to hold the battery with one hand while using both hands to operate the welding pens during spot welding, a DIY spot welding handle can be a practical solution. In this project, you just need a 3 × 12 mm copper plate, which has a cross-sectional area of 36 mm² and is sufficient for general use. If you also happen to have a tension spring, then the main materials are ready. With these simple parts, you can make your own spot welding handle. First, you need to draw a design sketch.
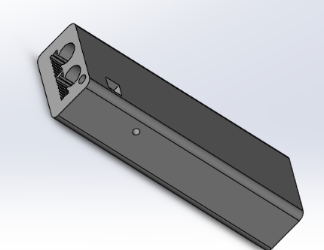
The two round holes on the upper side are used to hold the tension spring. You can see that the groove used to secure the copper plate is designed with a corrugated structure. This design helps reduce the friction between the copper plate and the handle. The two symmetrical holes on the side are used for M3 screws, which fix one end of the spring. The other end of the spring is connected to the copper plate.
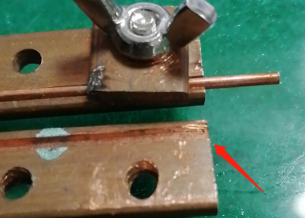
Then, you can use a grinding machine to create a small groove on the copper plate to secure the welding needle.
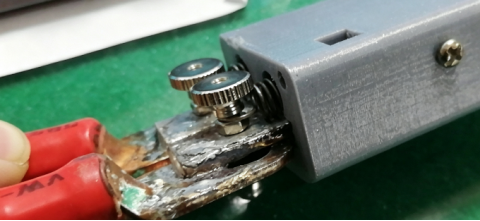
You can also reuse old parts. Remove the wire from the original old welding pen, secure it with screws first, and then solder it to further reduce the contact resistance as much as possible.
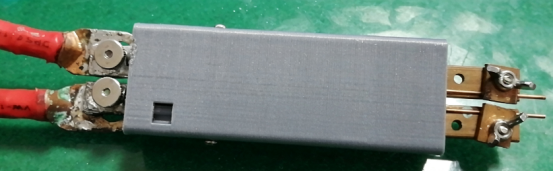
Let’s first check the retractable movement effect:
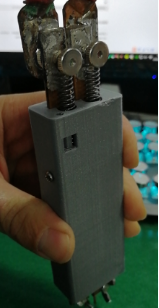
Then, install the push-button switch, and the DIY spot welding handle is complete.
With this simple modification, you now have one free hand to hold the battery or fix the nickel strip, making the spot welding process much easier and more convenient.


