
If there The GPD Win3/G161B-03 is a versatile device with a solid overall performance. However, one common issue users face is subpar heat dissipation, resulting in temperatures soaring to uncomfortable levels during intensive activities. In this guide, we will walk you through the steps to upgrade and improve your GPD Win3/G161B-03, enhancing its thermal performance and overall user experience.
Section 1: Initial Preparations
1.1 Removing the Outer Shell:
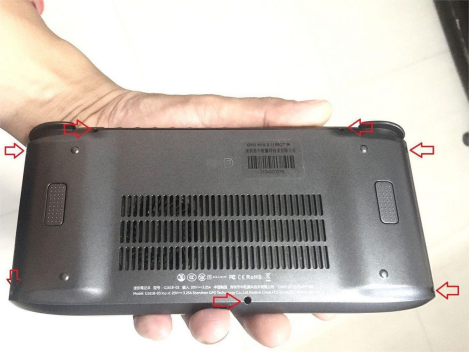
Begin by carefully removing the seven screws securing the outer shell. Take your time to avoid any damage during this process.
1.2 Battery Inspection:
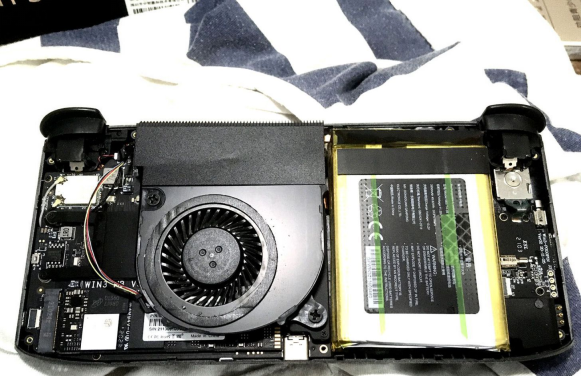
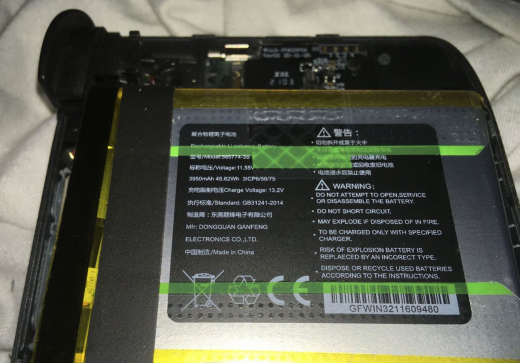
The device features a three-cell battery with a total voltage of 11.55V and a capacity of 3950mAh. It can provide over an hour of uninterrupted usage. Consider your usage patterns to determine whether battery life is a concern for your setup.
Section 2: Enhancing Thermal Performance
2.1 Fan Maintenance:
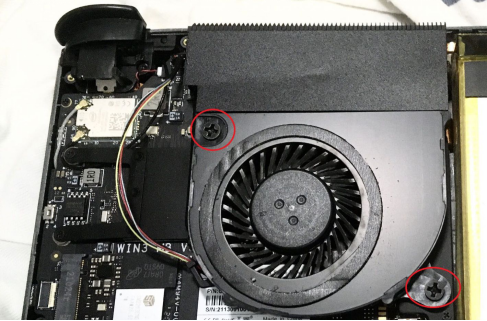
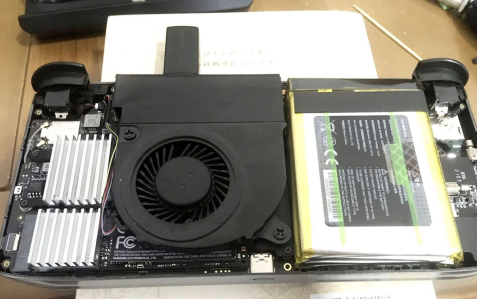
To address cooling issues, disassemble the device, remove the two screws holding the fan, and clean any accumulated dust. Exercise caution during this step to prevent damaging the fan blades.
2.2 Heatsink Upgrade:
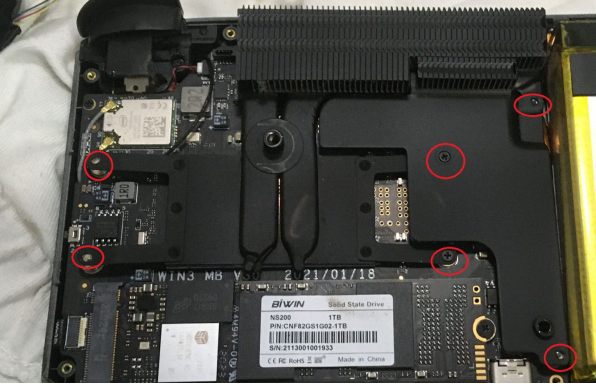
Remove six screws to detach the CPU heatsink and the power module heatsink. These two heatsinks are cleverly designed to prevent thermal interference between different components.
2.3 Thermal Paste Replacement:
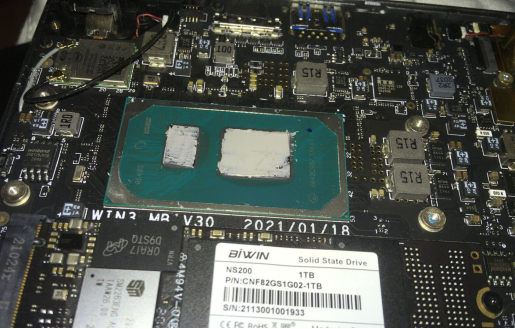
Clean off the original thermal paste and apply a high-quality thermal compound, such as MX-4, to improve heat transfer.
2.4 Solid-State Drive Upgrade:
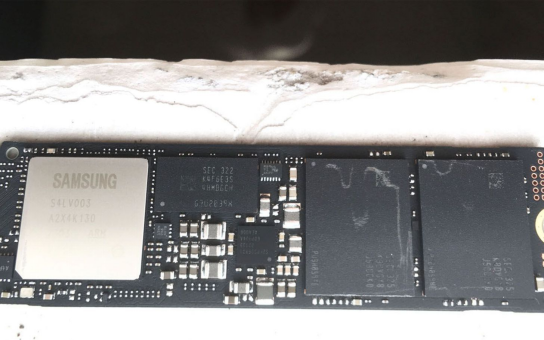
Consider replacing the original Biwin solid-state drive with a Samsung 980 PRO/2T for improved storage performance and reliability.
2.5 Passive Cooling Enhancement:
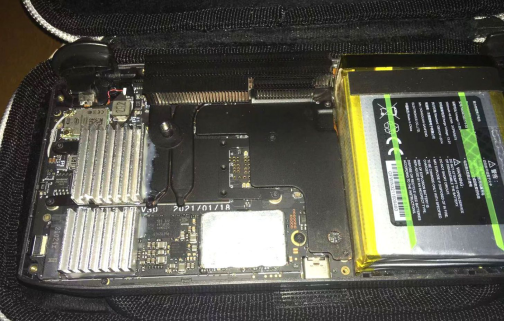
Install additional heatsinks on top of the solid-state drive to enhance passive cooling. Apply a larger heatsink near the CPU heatsink, a smaller one dedicated to the main controller of the hard drive, and use a small aluminum plate to aid in cooling the storage particles. This will help maintain lower temperatures for both the CPU and the hard drive.
Section 3: Fan Replacement (Optional)
3.1 Fan Comparison:
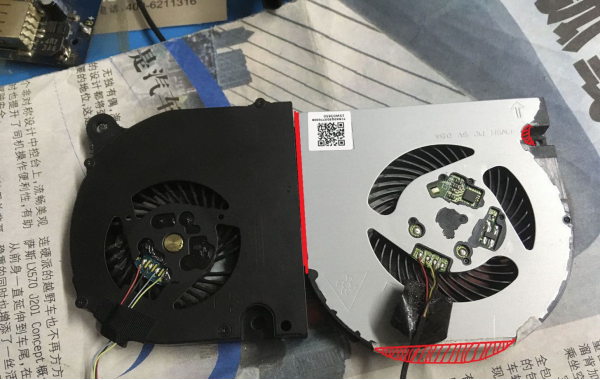
If you find the stock fan insufficient, compare it with the replacement fan. Ensure compatibility in terms of size and mounting holes. In some cases, you may need to modify the mounting holes to fit the new fan.
3.2 Wiring Considerations:
If the wiring differs between the old and new fans, you may need to desolder the old wires and solder on the new ones. Make sure to connect wires correctly, following color codes.
3.3 Installation:
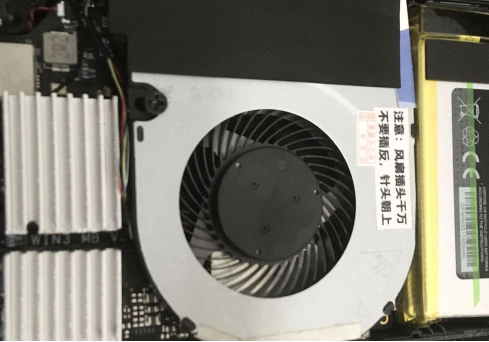
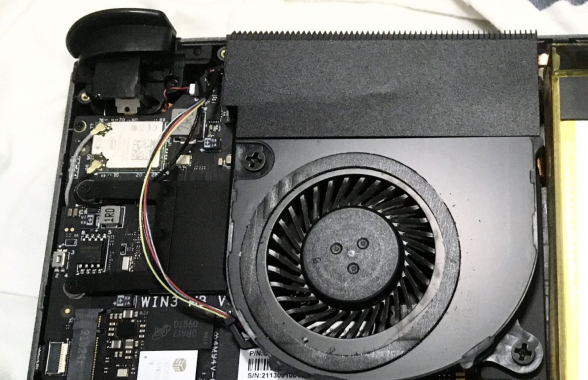
Carefully install the replacement fan, making any necessary adjustments to accommodate size differences. In testing, a slight increase in power consumption was observed, but the cooling efficiency significantly improved, resulting in quieter operation during regular use.
Section 4: Testing and Application
4.1 Utilizing Topaz VideoAI:
After the upgrades, test your device's performance by using Topaz VideoAI to enhance video quality. Be aware that due to the device's limited graphics capabilities, processing times may be extended.

4.2 Temperature Monitoring:
During full load testing, monitor the device's temperature. You should observe improvements in thermal performance with reduced temperatures, ensuring a smoother and quieter user experience.
Conclusion:
By following this comprehensive guide, you can transform your GPD Win3/G161B-03 into a more efficient and reliable device, with improved cooling, storage, and overall performance. If you're considering future upgrades, exploring options for enhancing the graphics card dock may also be worth considering.


