Enhancing your typing experience involves crafting a bespoke keyboard with superior features. While mechanical keyboards offer excellent tactile feedback, finding a wireless option with backlighting can be challenging. This guide presents a step-by-step process to transform an underutilized backlit Dareu mechanical keyboard and a Logitech K270 Unifying wireless keyboard into a high-performance, personalized device.
Key Objectives:
· Optimal Mechanical Feel: Maintain the superior tactile response of a mechanical keyboard.
· Wireless Convenience: Leverage Logitech's expertise in wireless technology for extended range and minimal latency.
· Efficient Power Management: Address the common issue of frequent recharging with a strategic battery solution.
· Customizable Backlighting: Integrate backlighting capabilities for enhanced visibility and aesthetic appeal.
Materials Needed:
· Backlit Dareu mechanical keyboard (unused)
· Logitech K270 Unifying wireless keyboard
· Miller charger
· Scratch-resistant jumper wires
· One diode
· Screws
· Minimal wiring
Step-by-Step Process:
1. Disassembly and Main Control Integration:
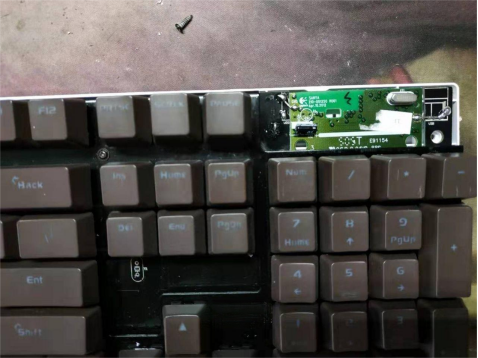
· Disassemble the Dareu keyboard, considering its limited internal space.
· Trim a section from the top right corner of the Dareu's PCB for securing the Logitech K270's main control.
· Utilize steel wires for stable soldering on both sides, ensuring a secure fit.

2. Battery and Charging Optimization:
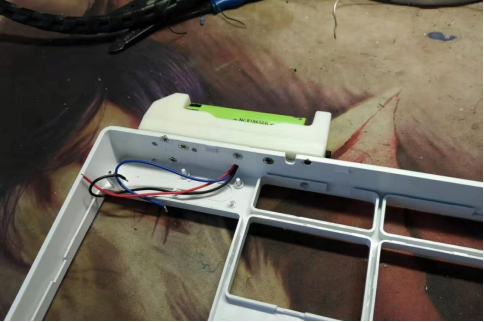
· Choose between internal lithium batteries (e.g., CR2032) for minimal backlighting or an external Miller charger for extended battery life.
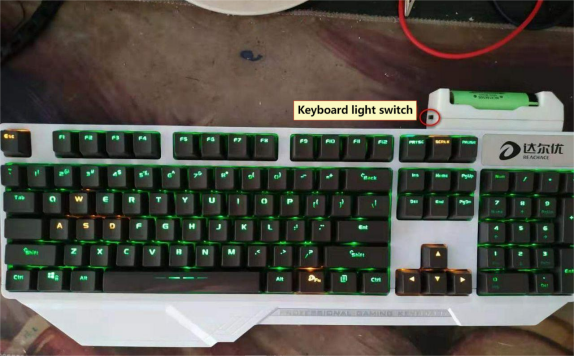
· Modify the charger with a toggle switch for backlight control and a diode for voltage reduction.
· Secure the modified charger inside the keyboard for stability.

3. Backlighting and Circuit Refinement:
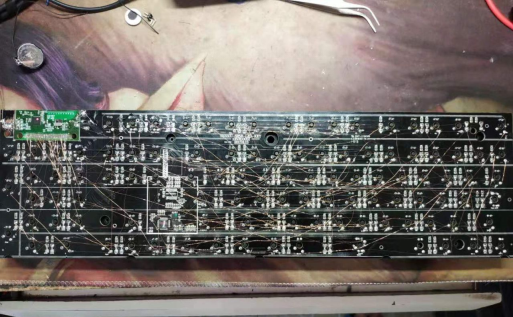
· Unsolder 4148 diodes on the PCB to minimize cutting.
· Retain the original keyboard lights and connect the Logitech keyboard's caps lock light to the corresponding location.
· Add a resistor between the Logitech main control's D+ and D- pins for proper functioning of the original keyboard light.

4. Final Assembly:
· Verify the functionality of all keys and lights.
· Assemble the keyboard, appreciating the optimized switches and tactile response.
· Enjoy the customizable backlighting feature, which can be turned off during daylight hours.
Performance Metrics:
· Current draw with backlight on: 65mA, providing approximately 50 hours of continuous use.
· Without backlight, a single charge of a 18650 battery should last around 5 years, with minimal power consumption due to the battery's self-discharge.

Embark on this DIY journey to create a personalized, high-performance keyboard that combines mechanical excellence, wireless convenience, efficient power management, and customizable backlighting.


