If you're interested in modifying the charger for a power drill, this article might be helpful to you.
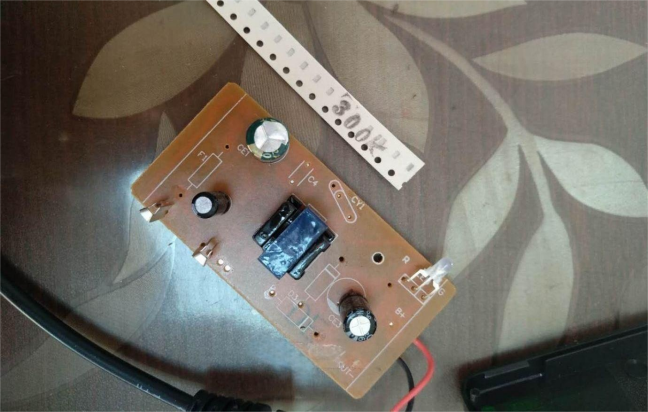
In this article, we'll focus on modifying the charger voltage for the Longyun drill. If you have a similar need, you'll first need to disassemble the drill, remove the battery, and take apart the charger. The battery is internally short-circuited with a reverse polarity protection diode, so it's necessary to adjust the output voltage from 13.75V to 13.18V.
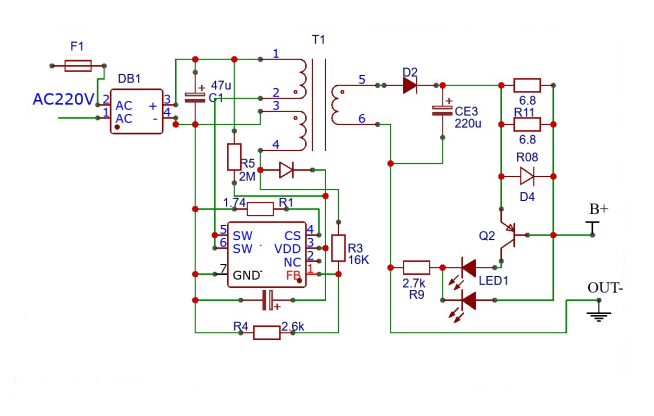
The circuit diagram is shown below. As you can see, it uses an unisolated, primary-side feedback structure without optocouplers or the 431 regulation chip. This design incorporates both voltage regulation and current limiting functions. Most small power supplies like those in optical modems use a similar primary-side feedback structure due to its simplicity and high reliability.


The charging circuit can also be viewed as a simple two-stage charging circuit. The power supply outputs 13.18V. When the battery voltage is less than 12.6V, the charger operates in constant current mode, with the current limited by the primary-side current setting, estimated at 500mA. When the current passes through diode D4, it experiences a voltage drop of over 0.6V, turning on transistor Q2. The LED will emit red light, while the green LED won't light up because its turn-on voltage is higher. As the battery voltage approaches 12.6V, diode D4 gradually turns off, Q2 also shuts off, and the LED turns green, indicating the battery is fully charged. The circuit then enters the second stage, which is constant voltage charging, with a charging current of about 160mA (calculated from 0.55/3.4). The charging process ends when the battery's protection board triggers, stopping the charge at 12.6V.
To change the voltage to 13.18V as mentioned in the two-stage constant current and constant voltage charging process, you would need to modify it as described above. If you want to adjust it to 12.6V, you would need to short-circuit diode D4, and the LED indicator will no longer show.
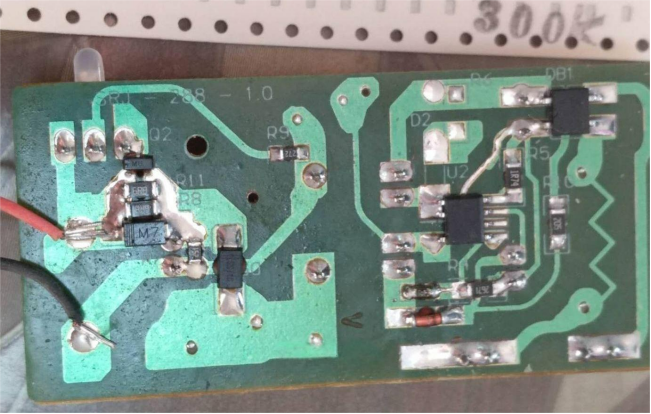
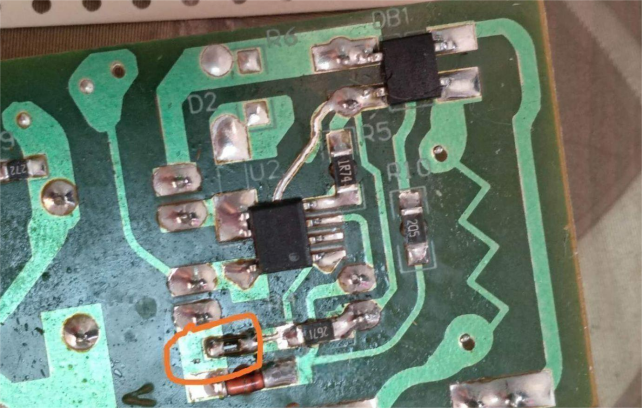
To drop the voltage from 13.75V to 13.18V, you can solder a 300K resistor on top of the existing 1602 (16K) resistor labeled R3.

That's it—modification complete!


