
If you're interested in adding heat sinks to your laptop, this article might be helpful. The Hasee K680E (Clevo NB50TJ1) originally comes with a 1TB mechanical hard drive plus a 16GB Optane Memory accelerator. If your shingled hard drive fails, you can replace it with a 500GB SSD and repurpose the 16GB Optane as a regular storage drive.
For those who need more storage, you can also install a 1TB M.2 SSD. However, with two hard drives running under the Southbridge chip, the temperature can rise significantly, leading to frequent shutdowns during gaming due to overheating. The Southbridge chip itself doesn't come with a heat sink, so what should you do?
If you have some small heat sinks from a router, you can start by using those. If you're not in a hurry, consider getting a larger heat sink for better cooling. After completing the upgrade, your laptop should operate without overheating or unexpected shutdowns for several days.
Steps to Install the Heat Sink
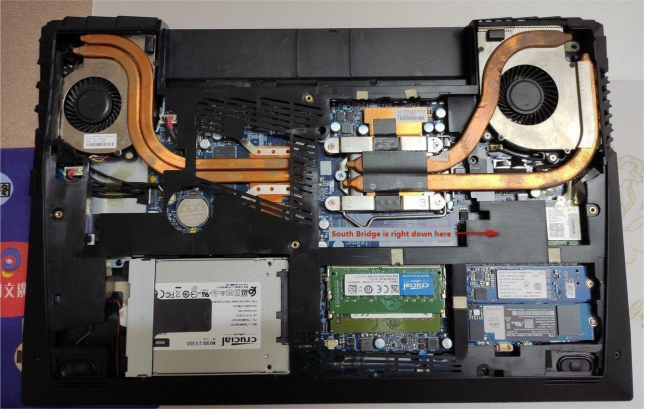
1. Remove the back cover: Unscrew the back panel of the laptop. The Southbridge chip is located under the area indicated by the arrow in the image.
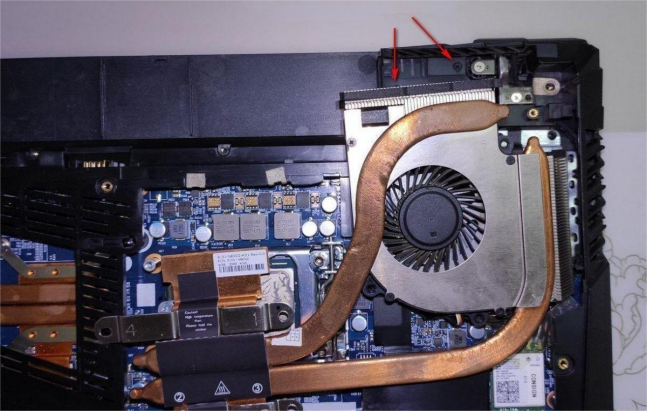
2. Detach the CPU fan: Pay attention to the two middle frame screws indicated by arrows in the image.
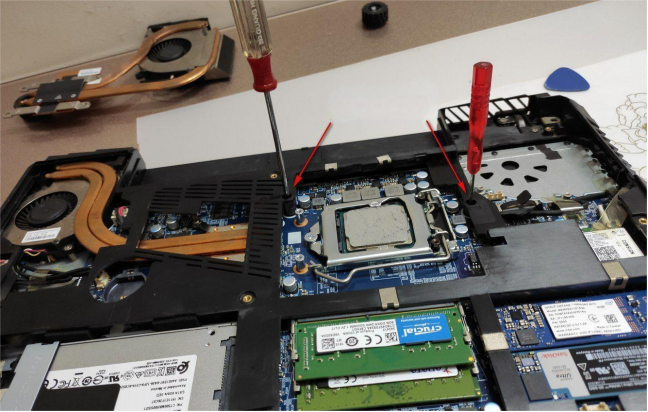
3. Unscrew the frame: Remove the screws holding the middle frame in place, and gently pry open the keyboard latches.
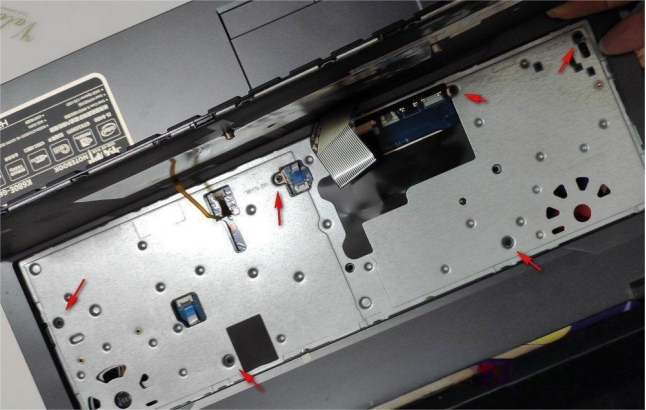
4. Remove the keyboard screws: Unscrew the six screws located under the keyboard as shown in the image.
5. Detach the middle frame: Use a spudger to carefully pry open the middle frame.
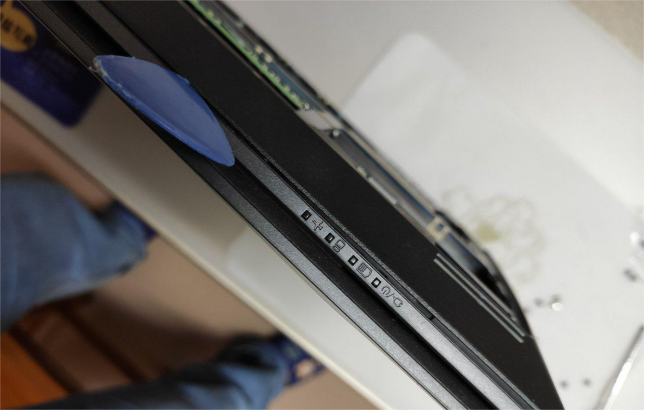
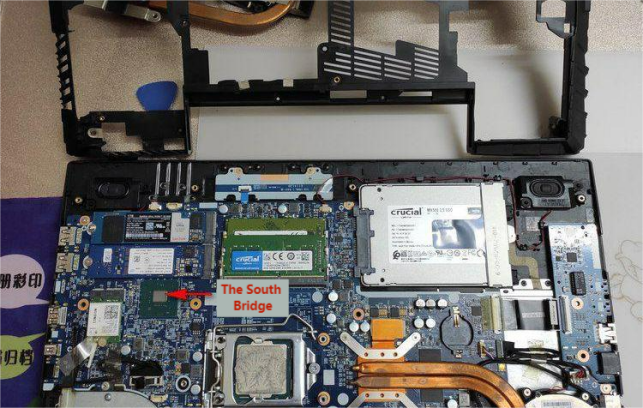
6. Locate the Southbridge chip: The chip is indicated by the arrow in the image.
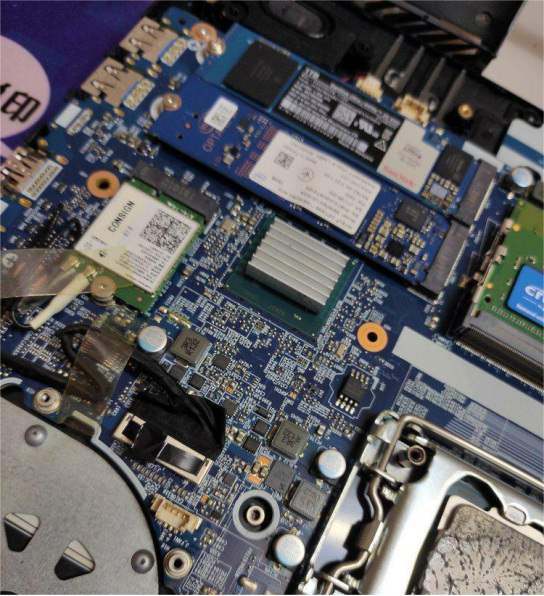
7. Attach the heat sink: Stick the heat sink onto the chip.
8. Check the temperature: After installing the heat sink, the temperature readings should look like those shown in the final image.
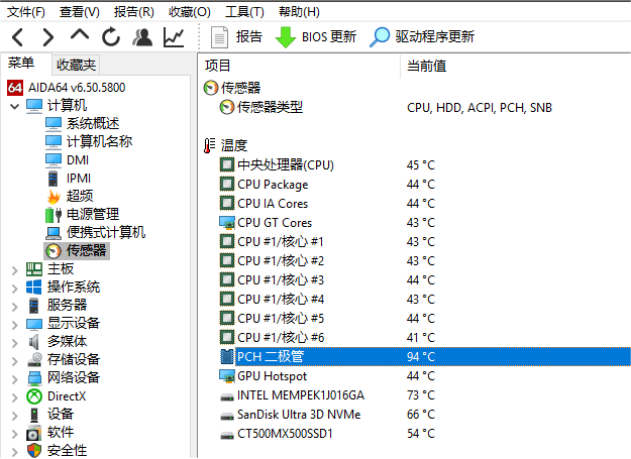
And that's it — you're all set! With the new heat sink installed, your laptop should now operate smoothly without overheating.


