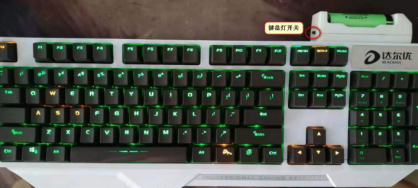
DIY Wireless Mechanical Keyboard with Backlight and Built-in Charger


If you are interested in DIYing a wireless mechanical keyboard with backlighting and a built-in charger, you might want to check out this article.
If you happen to have a spare mechanical keyboard, a Logitech K270 Unifying wireless keyboard, a Miller charger, paint-free jumper wires, one diode, some screws, and a few short wires, you can get started with this project.
Getting Started:
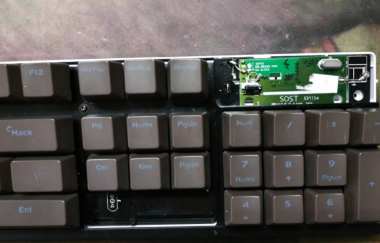
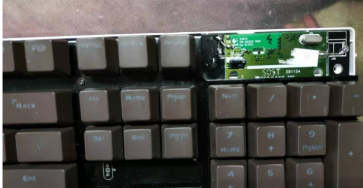
This modification uses flying wires, so you will need to be patient. First, disassemble the keyboard. The internal space is limited, making it difficult to fit the Logitech K270's controller inside. Although you could place it in the lower-left corner of the keyboard, flying wires would be inconvenient without securing the controller, and the wires could easily break. Therefore, cut off a section from the upper-right corner of the original keyboard's PCB, since that part of the PCB is not used anyway. Then, solder the Logitech controller onto the remaining board. Use steel wires for soldering and solder them to both sides of the PCB. This will hold the controller firmly in place.
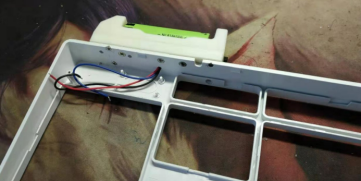
As mentioned earlier, the keyboard has very limited internal space. If you do not need backlighting, you can use a compact battery, such as an AAA battery, a CR2032 coin cell, or a small lithium battery. However, if you want backlighting, there will not be enough room for the battery inside the keyboard. In that case, you can mount the battery externally and use the Miller charger directly. This charger supports fast charging and, more importantly, has a battery level display, so you do not have to worry as much about the battery losing its charge while installed for extended periods. If the keyboard runs out of power, you can either recharge the battery or immediately replace it with another one.
The charger also requires a few minor modifications. First, add a toggle switch to control the keyboard backlight. Second, connect a diode in series with the other output to reduce the voltage by 0.6 V, eliminating the need for an additional voltage-reduction module. The charger has three output wires: a ground wire, a wire that supplies power directly from the battery to the keyboard backlight, and a wire that supplies power to the Logitech controller after the voltage has been reduced by the diode. After opening the charger, secure it to the keyboard using countersunk screws of an appropriate length. This provides a very secure mounting solution. Of course, the four screws included with the charger can also help hold it in place, although they do not provide as secure a fit.
On the back of the PCB, first desolder all the 1N4148 diodes. This reduces the amount of PCB cutting you need to do. Then, cut off all the other diode leads. Keep the original keyboard backlight, and use jumper wires to connect the Caps Lock indicator on the Logitech controller to the corresponding position on the keyboard.
When you power on the original keyboard controller through its positive and negative terminals, the keyboard backlight will briefly turn on and then go out. Solder a resistor with a resistance of a few hundred kilohms across the controller's D+ and D- terminals. This modification allows the backlight to stay on when the original controller receives power. Once you have confirmed that the keyboard backlight works properly, all that remains is to complete the flying-wire soldering.
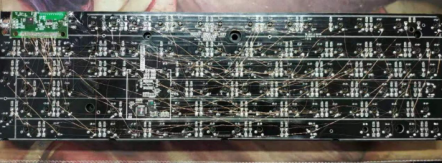
After confirming that all the keys work properly and the lighting functions normally, reassemble the keyboard, and you are done. Although this is not a new keyboard, its switches have been optimized, and any switches that did not work well have been replaced. You can turn off the backlight during the day when you do not need it.
The measured current consumption is 65 mA with the backlight turned on. As the battery voltage drops over time, the current consumption will decrease. Therefore, you can expect the backlight to run continuously for approximately 50 hours. If you leave the backlight off, a single charge of an 18650 battery might theoretically last for up to five years, with most of the battery's energy loss over that period attributable to self-discharge.