In the previous DIY guide, DIY M8 Electronic Load & Resistance Tester, we introduced the M8 microcontroller-based constant current digital electronic load and AC internal resistance tester. This guide covers its upgraded version. If you're interested, keep reading!
The updated version's basic circuitry is quite similar to the old one. The improvements you'll need to make are as follows:
Hardware Improvements
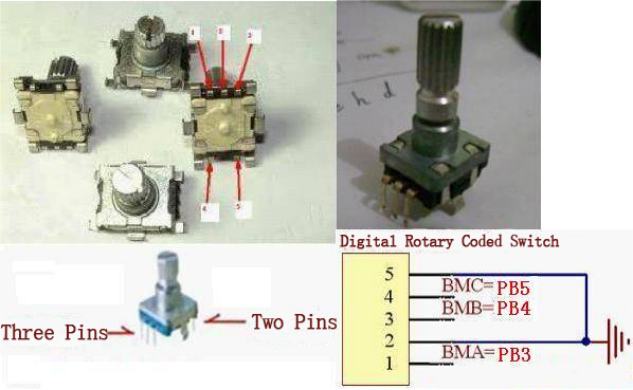
· Use a 1602/1604 display
· Replace the buttons with a single rotary encoder switch
· For wiring, use the original 3-wire button interface and add a GND wire:
· KEYA → PB3
· KEYB → PB4
· KEYC → PB5

To improve accuracy at low-end voltages, you’ll need to measure voltage in two ranges—automatically switching between 50V and 5V. Use ADC2 (PC2) to test low voltage (<4.5V), connected to the discharge voltage test point. Use two 100K resistors for 1/2 voltage division.
Operation
Calibration Mode
Press and hold the center button while powering on to enter calibration mode:
· V: Voltage calibration, done in two stages
· I: Current calibration
· Ra: AC internal resistance calibration
· Vbt: System battery voltage calibration
· load: Load calibration parameters
· save: Save calibration parameters
· exit: Exit calibration mode
Normal Operation Mode
Lock Mode
· Enter via the “lock” option in the function menu or after 5 seconds of inactivity
· Rotate the knob left/right to switch the displayed content
· Any button press exits lock mode
Function Selection Mode
· Enter by holding the center button for 2 seconds
· Menu options:
· "Lock": Enter lock mode
· "Load": Turn on electronic load
· "LoadOFF": Turn off electronic load
· "setV": Set voltage limit
· "setI": Set current limit
· "Ra": Enable AC internal resistance testing
· "RaOFF": Disable AC internal resistance testing
· "zeroAH": Reset capacity
· "zeroRa": Zero AC internal resistance
· "zeroI": Zero current
· "DCtest": Enable maximum power current test
· "DCtestOFF": Disable maximum power current test
Quick Operation
Hold the center button for 5 seconds to turn off the electronic load.
Complete


